 By Kevin
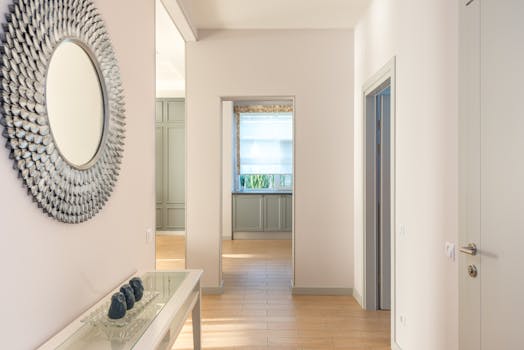

Imagine stepping into a living room where shadows dance harmoniously with light, where the ambiance shifts with your mood, and where every corner feels intentionally illuminated. For years, we’ve relied on a single, often harsh, overhead fixture to light our most cherished gathering spaces. But what if there’s a more sophisticated, more adaptable way to bathe your living room in light? This is where the magic of recessed lighting truly begins to unfold. The question isn’t just how to add recessed lighting to your living room, but why and how to do it thoughtfully, transforming it from a mere functional necessity into a powerful design element.
The Foundation of Illumination: Why Recessed Lighting?
Before we dive into the ‘how,’ let’s explore the ‘why.’ Recessed lighting, often called “can lights” or “downlights,” offers a clean, minimalist aesthetic that can elevate any room. Unlike surface-mounted fixtures, these lights are installed within the ceiling, providing a sleek, unobtrusive look.
Uncluttered Aesthetics: They eliminate the visual clutter of hanging lamps or bulky ceiling fixtures, creating a more spacious and modern feel.
Versatile Lighting Layers: Recessed lights are brilliant for creating a layered lighting scheme. They can provide ambient (general) light, accent light for artwork, or task light for reading nooks.
Enhanced Ambiance: With dimmers, you can completely transform the mood of your living room, from bright and lively for entertaining to soft and cozy for a quiet evening.
Mapping Your Luminosity: Planning Your Recessed Light Layout
This is where critical thinking truly comes into play. Simply scattering a dozen cans across the ceiling won’t achieve the desired effect. A well-planned layout is the cornerstone of successful recessed lighting.
#### Defining Your Living Room’s Zones
Think about how you use your living room.
Seating Areas: Where do people typically sit? You’ll want to ensure comfortable illumination for reading or conversation without direct glare.
Focal Points: Do you have artwork, a fireplace, or a striking architectural feature you want to highlight? Accent lighting is perfect for this.
Traffic Flow: Consider walkways and entry points to ensure safe and welcoming illumination.
#### The Magic Grid or Strategic Spotting?
There are a few common approaches to laying out recessed lights:
The Grid Method: This is often used for general ambient lighting. Lights are spaced evenly across the ceiling, typically 4-8 feet apart, depending on ceiling height and the beam angle of the lights. This method provides uniform illumination.
The Wall Wash Technique: For illuminating walls, especially those with artwork or shelving, place lights 1-3 feet from the wall. This creates a smooth, even wash of light that accentuates the wall’s texture and contents.
The Accent/Spotlighting Method: These lights are aimed at specific objects or areas to draw attention. They are often used in conjunction with ambient lighting and might be placed directly above or angled towards the item of interest.
It’s interesting to note that the most effective living room lighting schemes often combine these methods. For instance, a grid for general ambiance, with a few carefully placed accent lights for artwork. This thoughtful approach is a significant part of how to add recessed lighting to your living room in a way that maximizes its potential.
Choosing Your Light’s Character: Fixture Types and Beam Angles
Not all recessed lights are created equal. The type of fixture you select will profoundly impact the light’s quality and distribution.
#### Housing: The Foundation Within the Ceiling
Remodel (or Old Work) Housings: These are designed for installation in existing ceilings where you can’t easily access the joists from above. They’re secured by clips that grab onto the drywall.
New Construction Housings: These are installed before the drywall goes up and are more robust, often designed to be directly in contact with insulation (IC-rated).
If you’re asking yourself how to add recessed lighting to your living room without tearing down the entire ceiling, remodel housings are likely your go-to.
#### Trims: The Visible Face of Your Light
The trim is the decorative ring that you see inside the can.
Baffle Trims: These have concentric rings that help reduce glare. They’re excellent for general lighting and can be found in various colors.
Reflector Trims: These have a shiny, mirrored surface and are designed to maximize light output. They can be a bit more prone to glare if not positioned carefully.
Gimbal Trims: These allow you to adjust the direction of the light beam, making them perfect for accent lighting where you need to aim the light precisely.
Wall Wash Trims: These have a specially designed reflector to create that even wash of light on walls.
#### Beam Angle: Controlling the Spread
Narrow Flood (15-25 degrees): Good for accent lighting or highlighting specific objects from a distance.
Flood (25-45 degrees): A good all-around choice for general illumination in most rooms.
Wide Flood (45-60 degrees): Useful for covering larger areas with fewer fixtures.
In my experience, a mix of 4-inch or 6-inch LED recessed fixtures with a flood beam angle for ambient light, and a few smaller gimbal or adjustable trims for accenting artwork, offers a superb balance.
The Practicalities: Navigating the Installation Process
This is where the rubber meets the road. While some DIY enthusiasts might tackle this, it’s crucial to understand the electrical work involved.
#### Safety First: Powering Down and Planning Ahead
Turn off the power at the circuit breaker before you do anything. Double-check with a voltage tester.
Locate joists: You’ll need to know where your ceiling joists are to avoid cutting into them. Stud finders are invaluable here.
Consider wiring: You’ll need to run electrical wire from your power source to each fixture. This might involve fishing wires through the ceiling cavity.
Ceiling Height Matters: Higher ceilings generally require wider beam angles or more closely spaced lights to provide adequate illumination without creating hot spots.
#### Step-by-Step Essentials
- Mark your locations: Use a pencil and measuring tape to mark precisely where each fixture will go.
- Cut the holes: Use a hole saw or a drywall saw to carefully cut openings for your recessed housings.
- Install the housings: Insert the chosen housings (remodel or new construction) and secure them according to the manufacturer’s instructions.
- Wire the fixtures: Connect the wires from your power source to each fixture, following standard electrical codes. This usually involves connecting black to black (hot), white to white (neutral), and green or bare to ground.
- Install the trims and bulbs: Snap or screw in the trims and install your chosen LED bulbs.
- Restore power and test: Turn the power back on and test each light.
For those considering how to add recessed lighting to your living room, understanding that this is an electrical project is paramount. If you’re not comfortable with wiring, it’s wise to hire a qualified electrician.
Beyond the Basics: Smart Controls and LED Innovations
The world of lighting has advanced considerably. When planning how to add recessed lighting to your living room, consider these modern enhancements.
#### Smart Dimmers and Controls
Programmable Scenes: Set different lighting moods for activities like “movie night,” “reading,” or “dinner party.”
Voice Control: Integrate with smart home systems like Alexa or Google Assistant for hands-free operation.
Remote Access: Adjust your lights from anywhere using your smartphone.
#### The Dominance of LEDs
Energy Efficiency: LEDs use significantly less energy than incandescent bulbs, saving you money on your electricity bill.
Longevity: They last much longer, reducing the frequency of bulb replacements.
Color Temperature Options: Choose from warm, cozy tones (around 2700K) to brighter, cooler tones (4000K+) to suit your desired ambiance. Many LEDs are also dimmable and offer adjustable color temperatures.
Wrapping Up: Illuminating Your Vision
Adding recessed lighting to your living room is more than just installing lights; it’s an opportunity to sculpt the atmosphere of your home. It’s about asking thoughtful questions: What mood do I want to create? How do I want my guests to feel? What architectural features do I want to emphasize? By approaching the project with an inquisitive and exploratory mindset, you can move beyond basic illumination and craft a lighting design that is both functional and profoundly beautiful. The journey of figuring out how to add recessed lighting to your living room is an investment in comfort, style, and the overall experience of your living space.